¶ Map Interactions
Various objects and mechanisms that Aura can interact with.
¶ Stealth
Stealth is the primary mechanic used to avoid enemies in Roya. Enemies can only spot the player in a straight line directly ahead of them and within 4 tiles. (Shadowcloak reduces this distance, Radiance increases it.)
Avoiding the sight of enemies allows the Aura to avoid the battle. If the player manages to start battle by sneaking up behind the enemy, Aura will start with a tactical advantage.
¶ Obstacles
These are objects that block movement, generally preventing access to loot or entrances. Each has a different way of removing them but all can be overcome using the Star Knightess ability.
¶ Rocks
- Removed using Bomb or Bomb+. (Note that Blessed Bombs do not work for this.
- Different types of Rocks need a different number of Bombs, with each Bomb+ being worth 5 Bombs.
¶ Wall crack
A section of wall that can be opened. Otherwise functions like a Rock.
¶ Miscellaneous obstacles
Things like blocked doors or barricades generally function the same as Rocks.
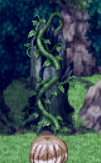
¶ Plants
- Removed by the Fire spell.
- Different types of Plant require higher levels of the spell.
- Spell can be cast by anyone in the party. E.g. Charlotte or a Slime.
¶ Jumping point
Indicated by pulsating white circles around a gap.
- Aura can cross the gap if her AGI is high enough. This must be done each time.
- Current AGI is used so things that modify AGI such as the Cursed condition will effect whether a jump can be made.
¶ Cliff
Indicated by pulsating white circle above a cliff. A rope can be used to create a path up and down.
¶ Curse Traps
Indicated by a Pentagram-like symbol on the floor. Coloured ones are active, white are inactive. Often semi-hidden. Always in an area near demons or demonic anchors.
- Activate only once each, causing some permanent negative effect to Aura.
- Reduce MDEF
- Reduce WP
- Generate Corruption
- Will deactivate if the Demon they are linked to has its Core destroyed.
- Mira is able to cast a barrier on Aura that will allow her to trigger a Curse Trap without suffering the negative effect. This costs 1 Blessed Energy Potion+ each time.
¶ Damaging Floors
Indicated by Purple-ish floors, found in demon domains.
- Cause damage to the entire party by 10HP per step taken.
- Party members cannot die this way and will remain at a minimum of 1HP.
¶ Anchors
The entrances to Demonic Domains. Typically found at the end of dungeons and often guarded by a demon’s avatar.
- Require the Open Domain spell. With more powerful domains needing higher levels of the spell.
- Contain a domain map which will have Fragment enemies as well as the demon’s Core boss.
- Often, once the demon has been killed, the anchor drops a mana node.
¶ Loot
¶ Material Nodes
Indicated by stalagmite-like crystals. Different colours indicate different materials.
- Can be harvested to give 1 Material item. This costs 10 HP.
- Larger nodes can be harvested twice, the first time costing 25 HP.
- Types include:
- Emerald Leaf (green)
- Ether (blue)
- Maleficum (purple)
- Pyromantium (red)
- Star Metal (white)
- List of harvestable nodes
¶ Vines
Type of harvestable object that yields a rope in exchange for 5 of Aura's HP.
¶ Mana Nodes
Indicated by a swirling light. Can be absorbed to increase Max MP at the cost of MP. Costs and increases vary by node, but the most common node costs 5 MP to absorb and grants +3 Max MP.
¶ Fast Travel
Aura can travel around Roya by teleporting between various shrines once she has interacted with them. These are located at:
- Abandoned Shrine
- Trademond
- Located in the church in the northwestern part of the city
- Northern Mines
- Located in the Vault
- Forest of Runes
- Located in the Eastern Forest
- Underground City
- Aura can choose to enter in disguise as Anna if she has unlocked the Underground Bar costume
- Mountainreach
- Located in the church in the center of town
- During the Eternal Day of Sloth quest Aura cannot teleport out of Mountainreach
- Flooded Vault
- Located under Central Lake
- Verdeaux
- Located outside Main Cathedral in the southeastern part of the city
- Winterfall
- Located in the ruined church in the western part of the city
- Crystal Caverns
- Clockwork Forest
Additionally Aura can return to the Abandoned Shrine using the Recall skill.
¶ Misc
¶ Climable vine
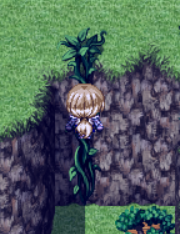
Thick vines that Aura can move up and down.